I have been having a lot of fun exploring food through national days this year and these Bao buns presented a fun new challenge. They are something that I have always love and admired from afar but never made for myself. They are surprisingly easier to make than you might think and you can fill them with anything you like!

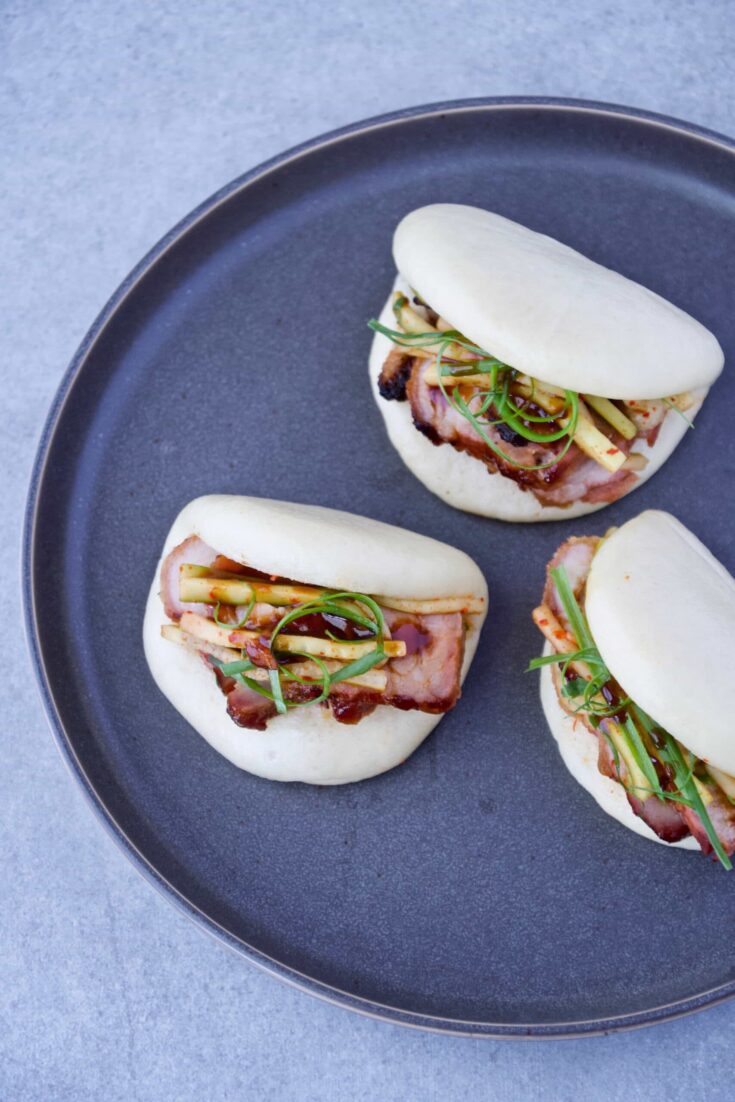
I roasted a pork belly on the grill to fill mine with, and I will be sharing more on that soon! But today we are going to focus on making these beautiful edible clouds. I got to enjoy some on a trip to Portland in the fall of 2018 and had been craving them ever since.
Making the Bao Buns dough
Bao Buns are a yeasted dough. They are kneaded and shaped in the same way as most traditional breads. Where they take a unique spin is in their cooking process, they are steamed, not baked.
Now I read and tested a few recipes, some use traditional flours and some called for rice flour. The difference is really only in color. Traditional flours leave the buns with the slightest yellowish tint, while the rice flour gives them a crisp white.
I came to the decision to use cake flour. It gives a bright color while keeping the dough soft and supple. It also helps the dough stay airy, after all that is what cake flour is all about!
I steer clear of the rice flour. It didn't seem to give me as great a rise and the only benefit to using it was for color. While that is nice, I like to go for flavor and fluffy over color.

Shaping the Bao Buns
Bao Buns are not difficult to make but they do take a little bit of patience to make. After the initial mixing and kneading, they will need to rise for about 2 hours. Then you punch down (this means to deflate and gently knead the dough again) the dough and add in a little baking powder and knead a little more.
After the first rise and kneading in the baking powder, you will shape the dough by rolling out a log and cutting it 18 pieces. Then roll those into balls, rest, and then shape. To achieve a perfect Bao Bun you will roll those little balls out into an oval and then fold them over a chopstick and then let them rise.
They will rest for about an hour and a half and then they are ready to steam. You want to remember which ones you folded first because you will want to steam those first. I only had space to steam 6-8 at a time so I didn't want them to overproof while they waited to cook.

Like I said, I filled my bao buns with a roasted pork belly that I topped with the cucumber kimchi salad. It was inspired by the one that Joanna Gaines shares in her recipe for Mom's Bulgogi in the "Magnolia Table Cookbook". It is a great salad and the perfect topping along with some sliced scallion tops.
You can read my review of the Bulgogi recipe HERE, it's a real stunner. I look forward to making that more. It would even be great in these buns.
This is such a great base recipe. The sky really is the limit here. Fill them with anything you like, they even lend themselves to fusion greatness.
I'd love to know if you make these. Drop me a line below and let me know what you fill them with. Enjoy!
For more Asian inspired dishes...
Take a look at my homemade Ahi Tuna Tower recipe, it is something I worked on a recreated at home during quarantine 2020 and is one that I think I will make again and again!
My General Tso's Chicken is a dish I would eat every day, and at a minimum, I cook every week at home.
A good soy sauce turns this fall favorite into a dream, try my friend Kristi's mom's recipe for Soy Sauce Pumpkin Seeds.
Bao is another one of those things that just makes me happy in the tummy. Try my homemade version of Bao Buns, and fill them with my Crispy Pork Belly.
📖 Recipe
Bao Buns
For lighter colored and textured buns it is important to use cake flour. Regular All-Purpose Flour will work, but your buns with just have a slightly deeper color.
Ingredients
- 525 g Cake Flour, plus extra for dusting
- 1½ tablespoons Sugar + a pinch
- ½ teaspoon Kosher Salt
- 1 teaspoon Fast-Action Dried Yeast
- 50 ml Milk
- 1 tablespoon Sunflower Oil, plus extra for greasing and brushing
- 1 tablespoon Rice Vinegar
- 200 ml Water
- 1 teaspoon Baking Powder
Instructions
- Mix together flour, sugar, and salt in a large bowl.
- Dissolve 1 teaspoon fast-action dried yeast and a pinch of sugar in 1 tablespoon warm water. Then add it to the flour with the milk, sunflower oil, rice vinegar, and water.
- Mix into a dough, adding a little extra water if needed.
- Tip the dough onto a lightly floured work surface and knead for 10-15 mins, or until smooth. This can also be done in a stand mixer with the dough hook.
- Place in a lightly oiled bowl, cover with a damp cloth and leave to rise for 2 hrs, or until doubled in size.
- Tip the dough out onto a clean work surface and punch it down. Flatten the dough with your hands, then sprinkle over 1 teaspoon baking powder and knead for 5 mins.
- Roll out the dough into a long sausage shape, about 1 ½ inches thick, then cut into pieces that are about 1 ½ inches wide. You should have 18 pieces.
- In the palm of your hand, roll each piece of dough into a ball and let rest for 2-3 mins.
- Cut 18 squares of baking parchment and put a bun on each.
- Use a rolling pin to roll out each ball, one by one, into an oval shape about ⅛th inch thick. Rub the surface of the dough ovals with oil and brush a little oil over a chopstick.
- Place the oiled chopstick in the center of each oval. Fold the dough over the chopstick, then slowly pull out the chopstick.
- Place each folded bun on a parchment square and transfer to a baking tray, cover with a clean tea towel or lightly oiled cling film and leave to prove in a warm place for 1 hr 30 mins, or until doubled in size.
- Heat a bamboo steamer over medium-high heat. Steam the buns for 8 mins until puffed up (you’ll need to do this in batches).
- Prise open each bun and fill with your favorite filling. Enjoy while still warm.
Notes
Buns can be kept in the refrigerator for a day or two after steaming. To reheat, warm your bamboo steamer and gently steam the buns again until warm.
Nutrition Information:
Serving Size:
1 gramsAmount Per Serving: Unsaturated Fat: 0g
If you want a little more info on shaping take a look at this photo tutorial from Bon Appétit.
Did you make this recipe? Let me know by leaving a review or comment! And be sure to sign up for my newsletter, and follow along on Instagram, Pinterest, and Facebook!
Did you make this recipe? Let me know by leaving a review or comment! And be sure to sign up for my newsletter, and follow along on Instagram, Pinterest, and Facebook!
Leave a Reply