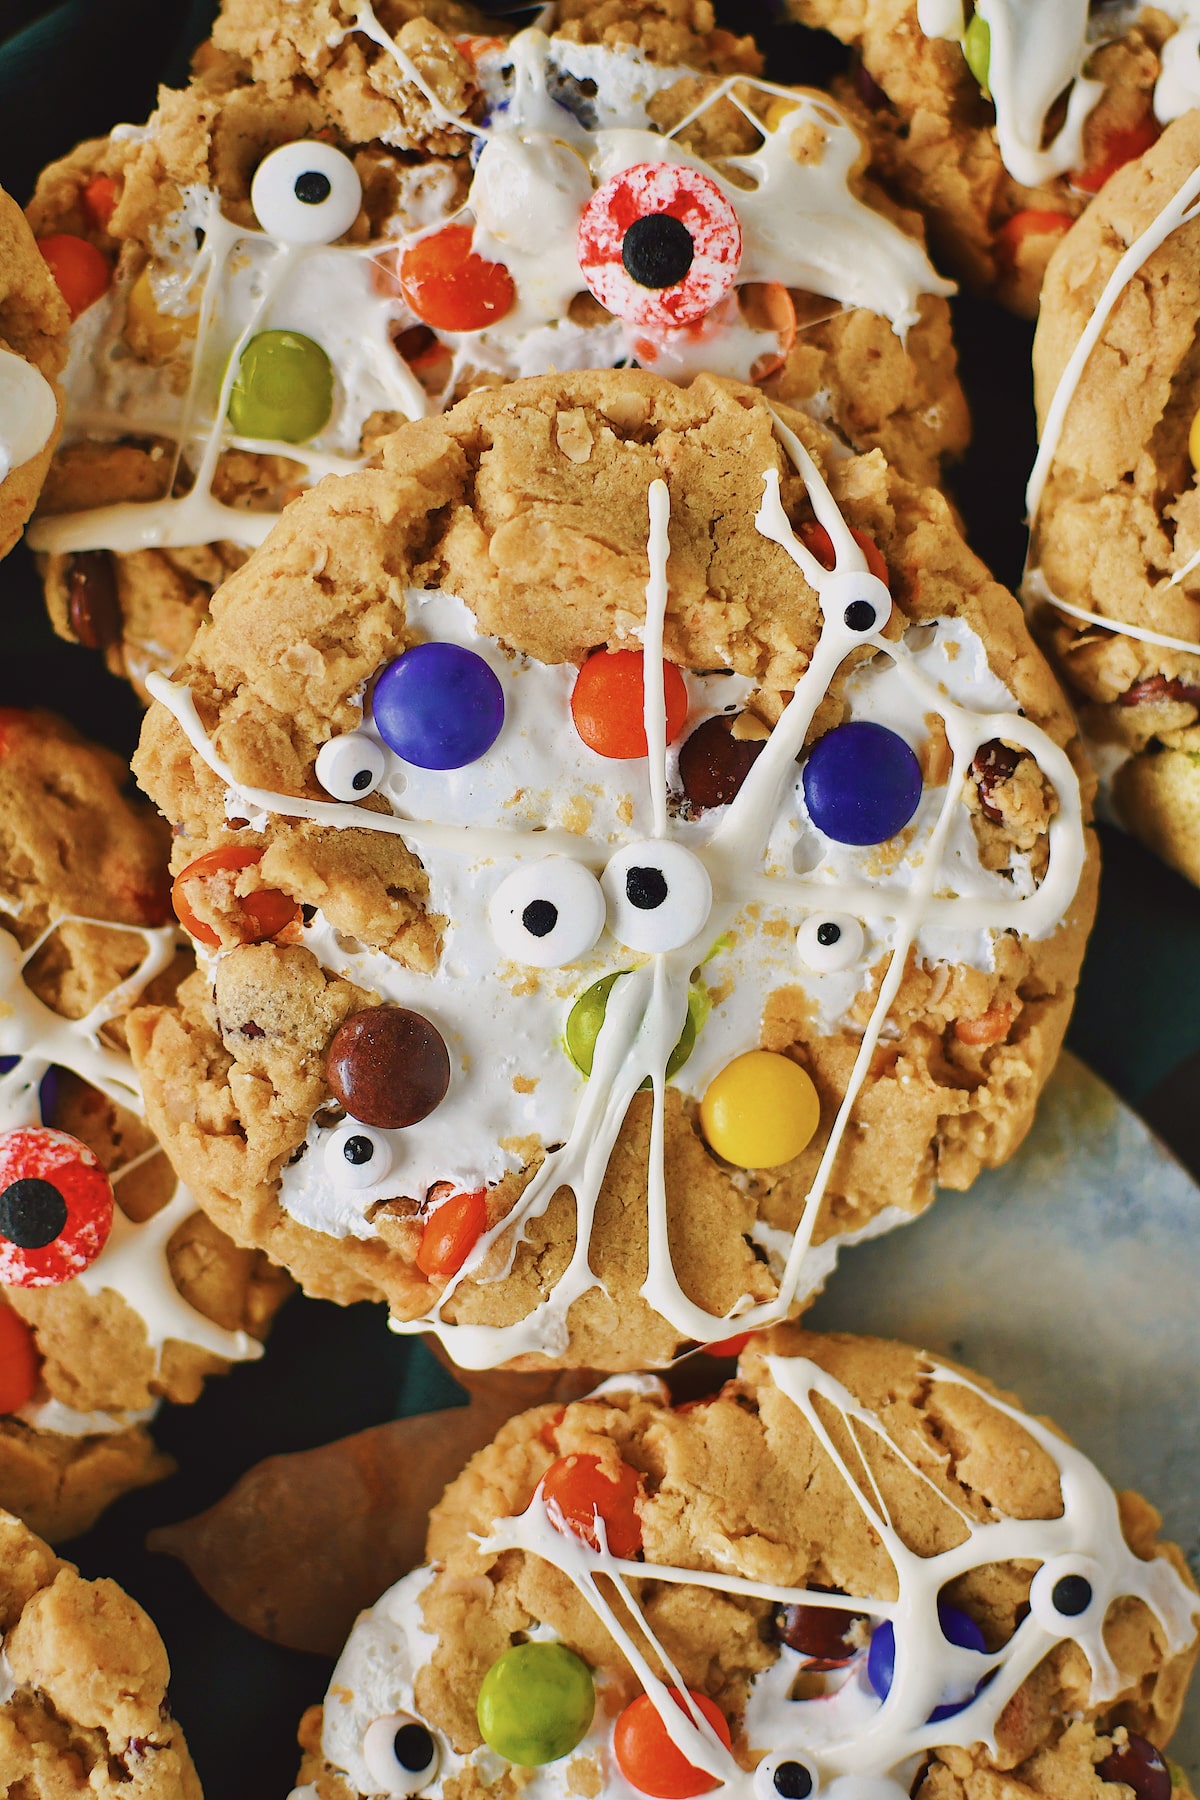
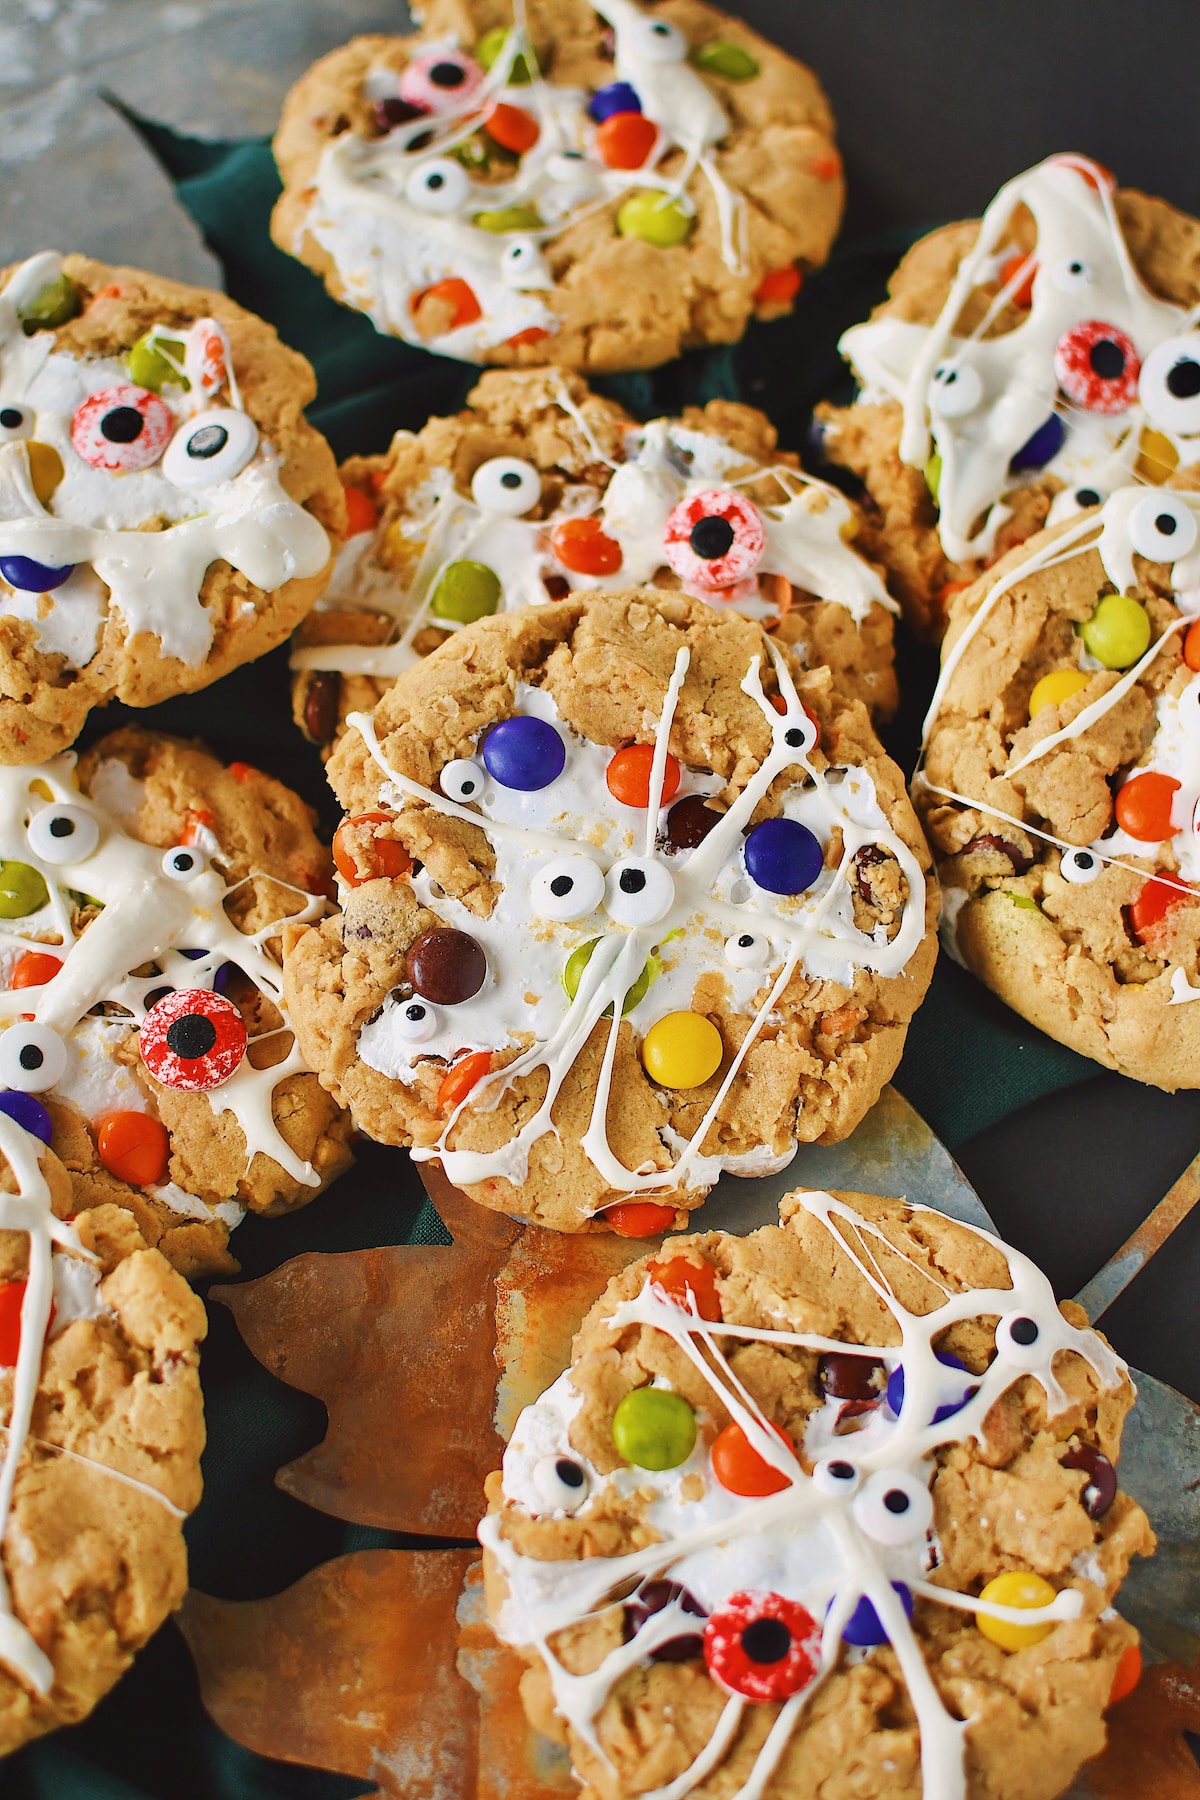
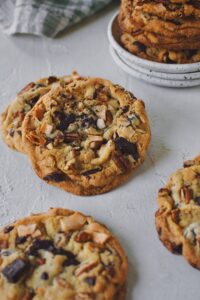
This recipe for Peanut Butter Monster Cookies takes my classic Fluffernutter Cookie and gives them a spooky Halloween twist.
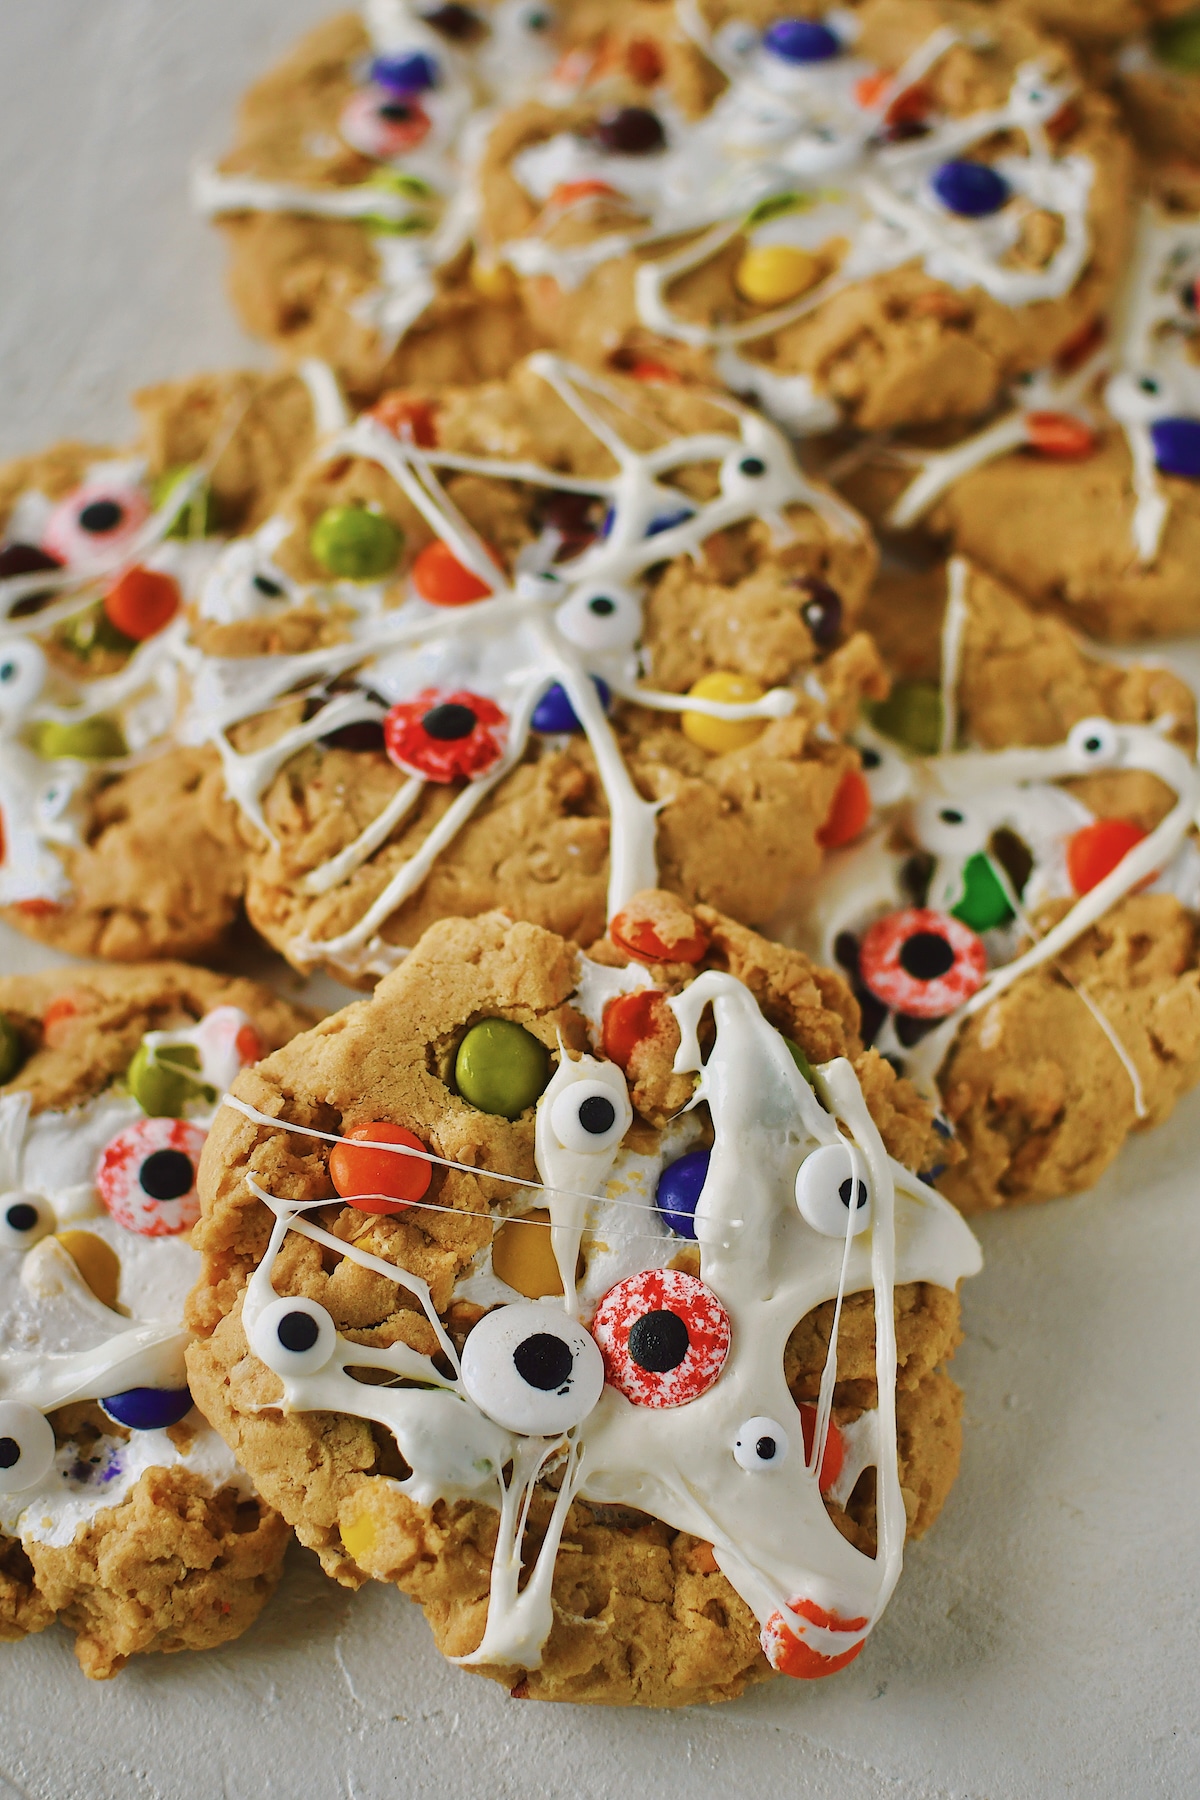
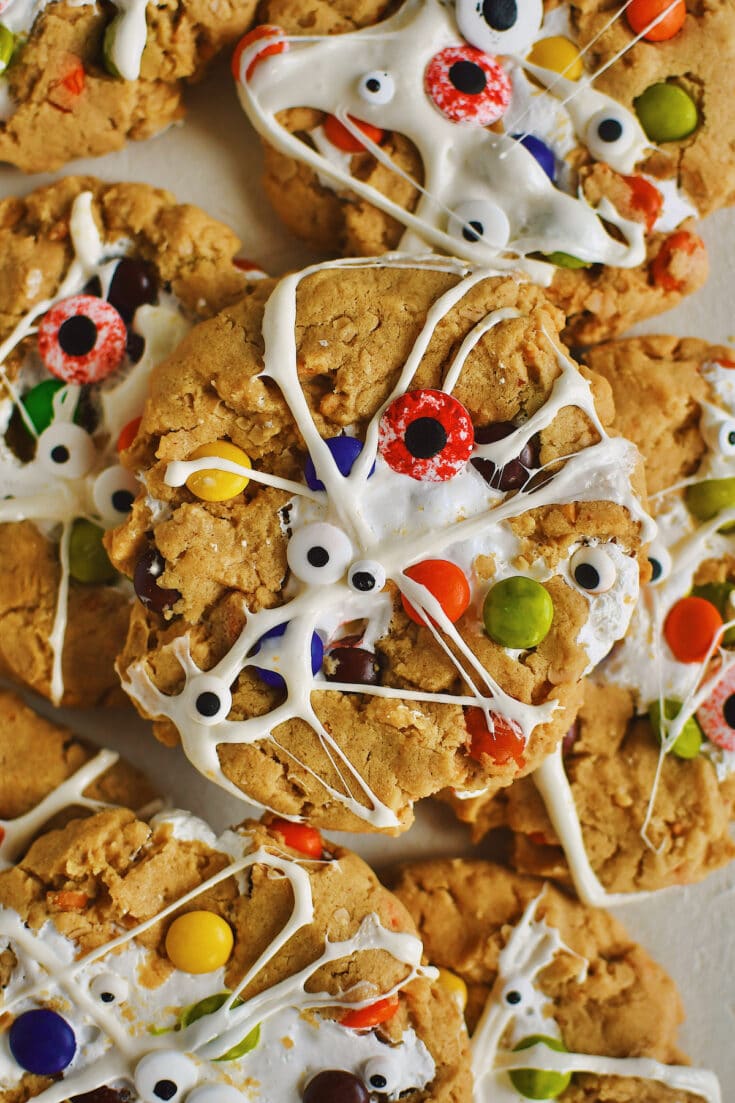
All you need is some candy eyeballs, of any variety, and some extra marshmallows to give a spider web or mummy wrap effect over the cookies.
This one may require a bit of extra patience when you are adding the marshmallow at the end. It gets really sticky and wild. But I am here to tell you now, take a deep breath before working with it, know it will be a mess, but if you prepare yourself for it, it can be a fun mess.
Ingredients
This ingredient list might look like it has a lot going on, but most of it is fun and doesn't add any extra time to making the actual cookies.
The one addition we are making, beyond the M&M's, Reese's pieces candy, and candy eyes, is the use of marshmallows to make the webs or mummy wraps. Whichever you want to imagine they are. And don't worry about what size marshmallows to use, you are going to melt them so it really doesn't matter.
What you need:
- Crunchy Peanut Butter
- Unsalted Butter
- Brown Sugar
- Granulated Sugar
- Egg
- Vanilla Extract
- Kosher Salt
- All-Purpose Flour
- Quick Cooking Oats
- Baking Soda
- Whole Milk
- Reeses Pieces Candy
- Halloween M&M Candy
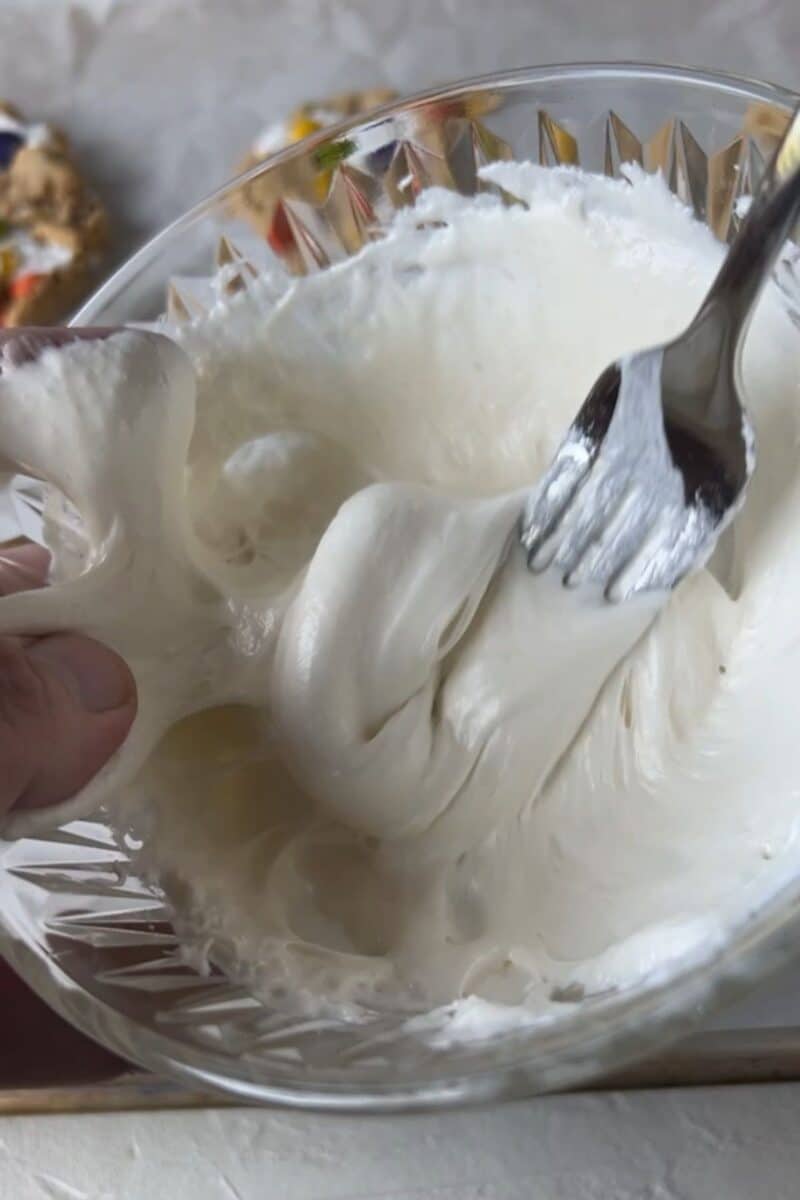
- Marshmallow Fluff/Cream
- Flakey Sea Salt
- Candy Eyeball Sprinkles
- Marshmallows
See the recipe card for full quantities.
Use the JUMP TO RECIPE button at the top of the post, or scroll to the bottom of the post to see the full recipe card with ingredient measurements and instructions.
Method
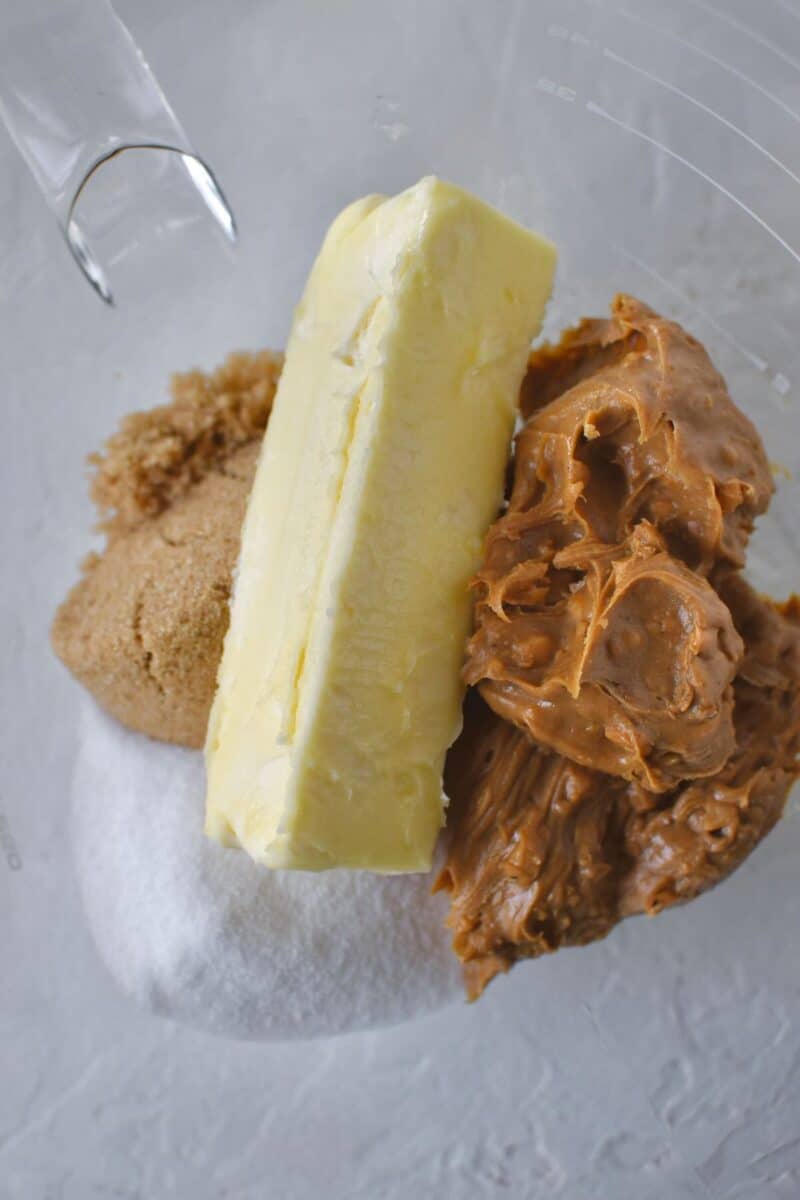
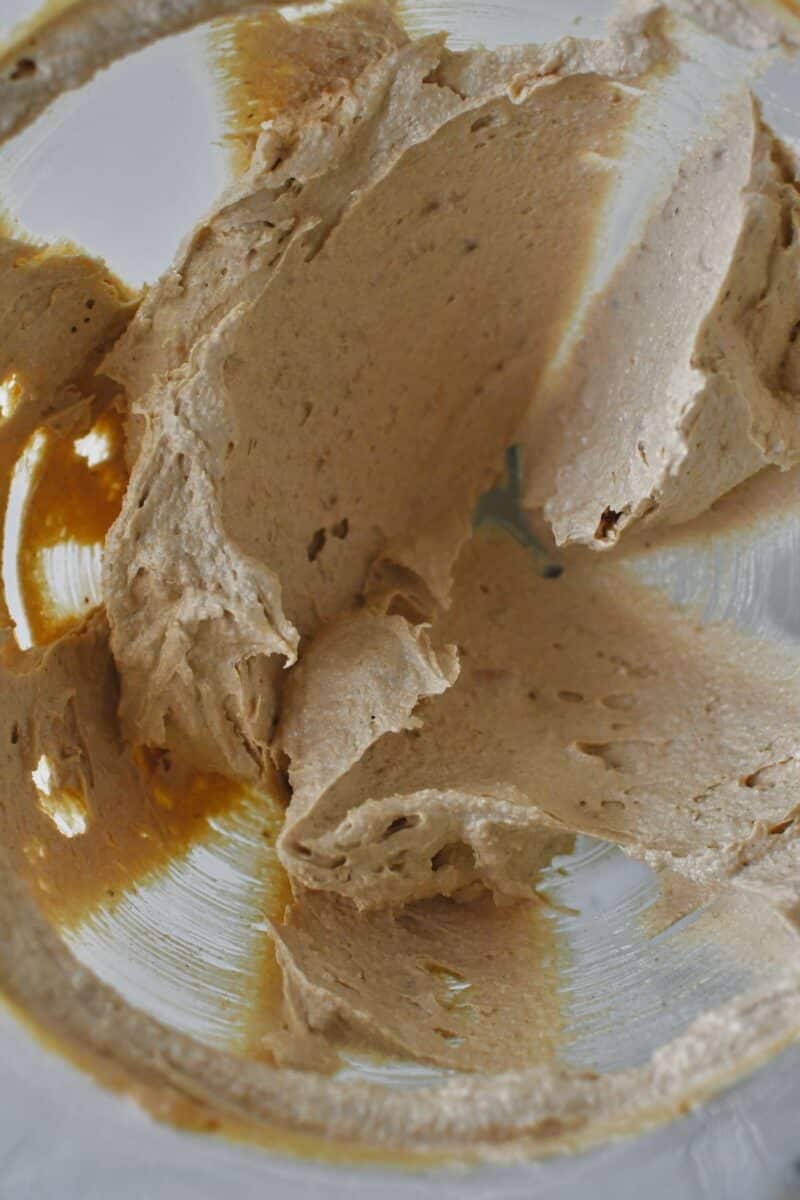
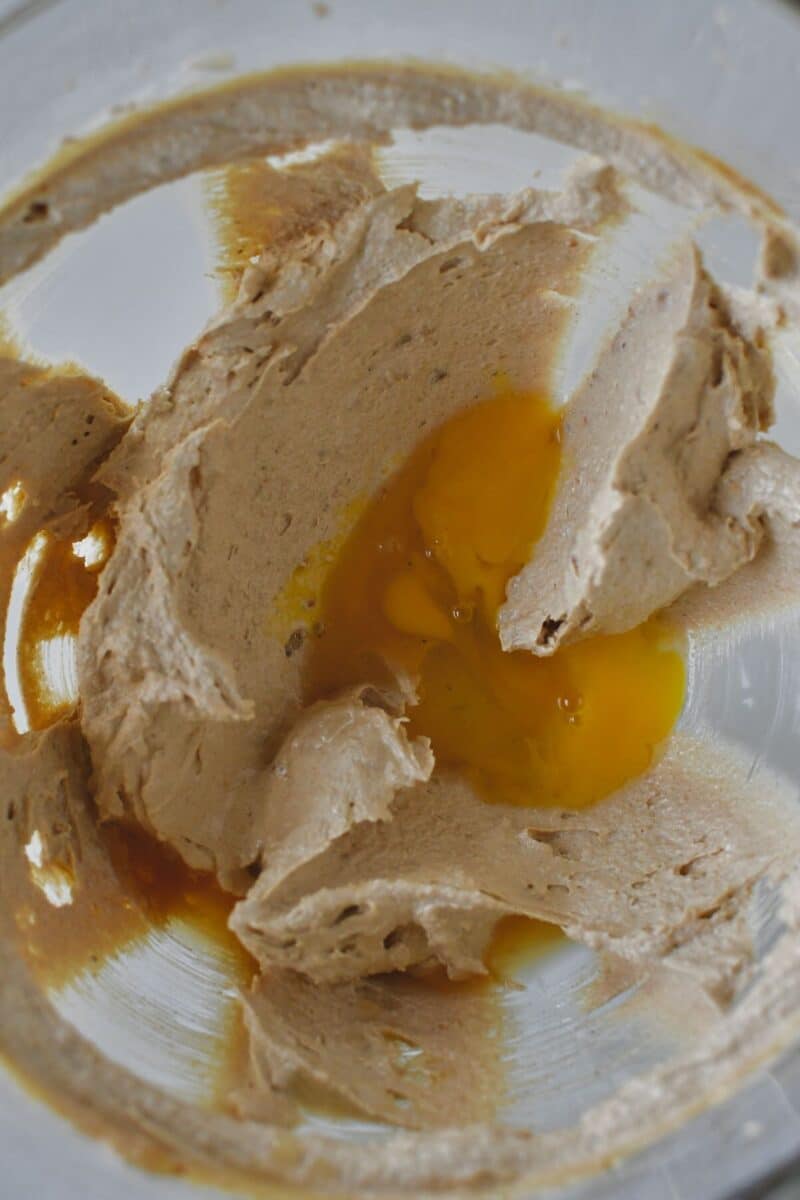
The cookie starts just like the classic by blending the butters and sugars together until well-creamed, light, and fluffy. Then beat in the egg, vanilla, and milk.
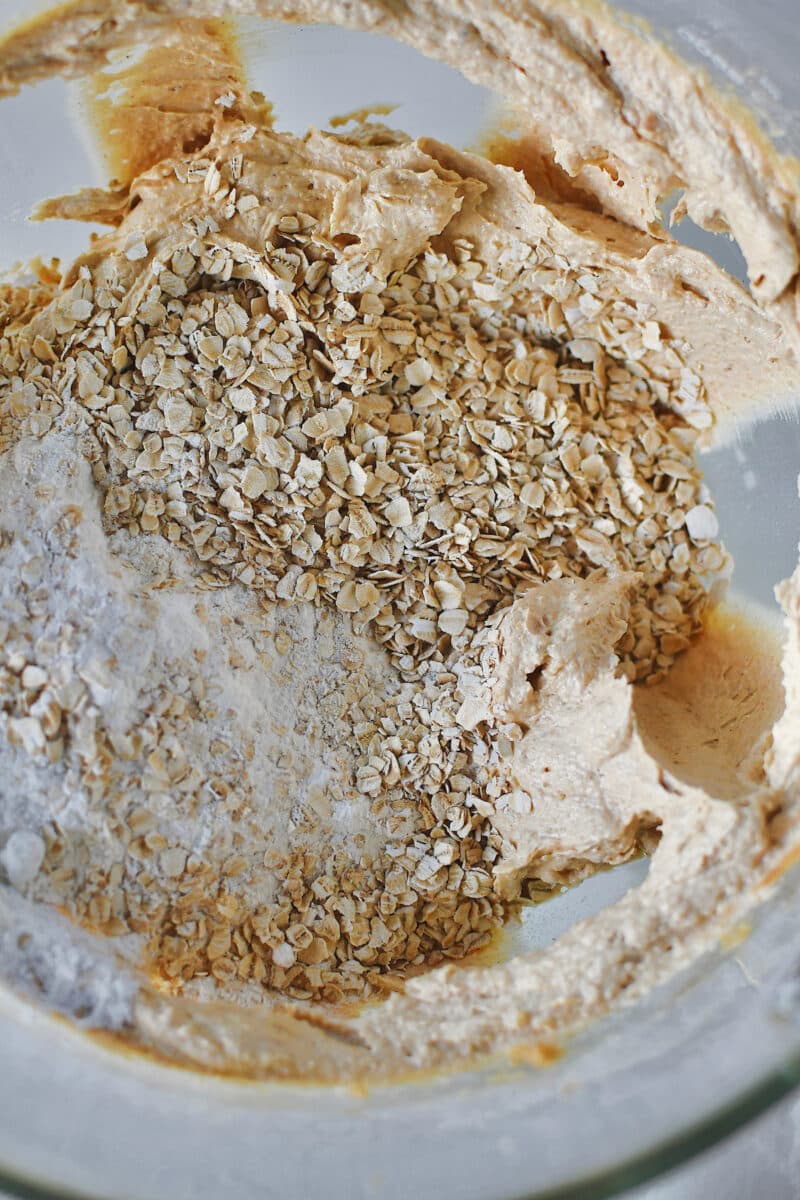
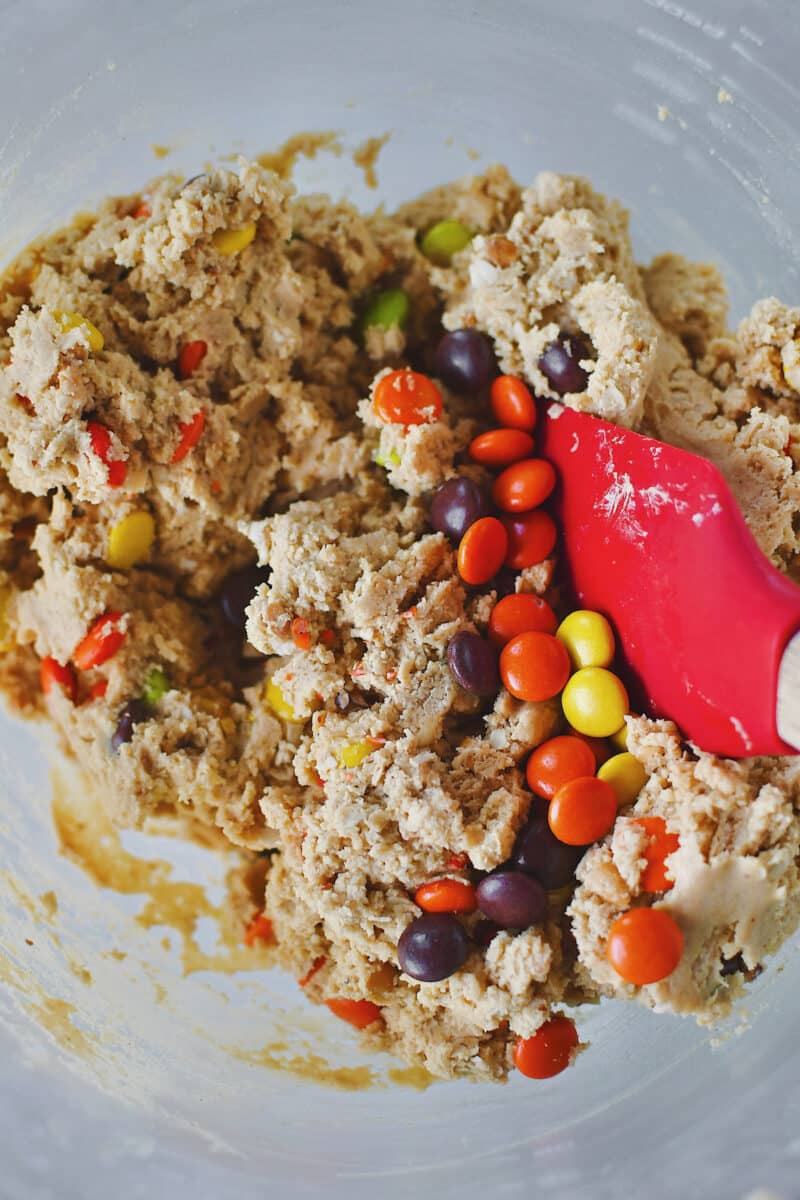
Then stir in the flour and oats and finish with the addition of the candies. Portion the dough out, flatten them, pipe the marshmallow fluff onto them, and then roll the dough up around it, and flatten again.

After the cookies bake and cool, melt the marshmallows in a bowl that is much larger than them, because they expand in the microwave. Stir them up after 30-45 seconds until smooth, then stretch the marshmallow over the cookies with your hands.
As I said earlier in the post, yes this gets a little messy and can test your patience, but go into it calmly and with that knowledge and let it be a fun mess. All messes can be cleaned up, and a little warm water and your hands will be clean again!

After you get your spider webs or mummy wraps, whichever you decide to call it, add the candy eyes. There is no wrong way to do this, more or less, it is all up to you. The more the scarier I say!
NOTES & TIPS
Be sure to cream the butters and sugars together for 3-4 minutes, you will see the mixture change to a lighter color. When it gets pale you have beat in enough air.
After you have made your cookie dough, portion it out and flatten each of the 12 portions using your 3 center fingers. Place the marshmallow cream in a piping bag, then cut off the tip and pipe about 2 tablespoons into the center of each cookie. Wrap the cream in the dough, then flatten again before baking. This gives a very consistent and not too flat, not too tall cookie.
When the cookies come out of the oven. Immediately sprinkle them with some flakey sea salt, it helps cut the sweetness of the cookie and the marshmallow cream and makes them even more enjoyable!
I also reserve some candy for pressing into the top after they come out of the oven too. This gives that bakery look that you don't get from ONLY mixing the candy into the cookie dough.
Melt the marshmallows for stretching over the top in 15-second increments in the microwave until melted. Mine only took 45 seconds. Stir after each time in the microwave until stretchy.
Now is the time to exercise patience. The marshmallow stretching is messy. The best tip I have for you is, the less you work with at a time, the better. Use a small bit and stretch between 2 or 3 fingers and then press it over the cookies, brushing the marshmallow off onto the edges of the cookie to get it off your hands and to stick to the cookies.
Work slowly, and know it is a bit crazy, but if you get in the right mindset and have fun with it, the mess can be cleaned up with a little warm water.
Baked Fluffernutter Cookies can be kept in an air-tight container for up to 5 days at room temperature. And while mine would never make it there, they can be frozen for up to 3 months. Freeze them flat on a tray, then transfer them to a zip-top freezer bag.
SUBSTITUTIONS
My favorite peanut butter is crunchy! But you can use smooth in a pinch if you need to. There are whole peanuts going in later anyway.
If you have to use salted butter because that is all you have on hand, remove the addition of salt later in the recipe.
Light brown sugar is preferred for this recipe, however, you can use dark in a pinch. The cookies will just have a little deeper color and molasses flavor to them. Which isn't bad, just a little richer.
These cookies bake up beautifully and can be made gluten-free when you use THIS cup-for-cup baking flour swap.
I used a mix of Halloween M&M's and Reese's pieces candy for my cookies. You can use all of one kind if you prefer, but who doesn't want more chocolate and peanut butter?
While I prefer the original marshmallow fluff, you may also find other brands out there calling it marshmallow cream, they are essentially the same and you can use either for this cookie. You may also encounter it called marshmallow paste or spread.
While you might be tempted to use mini marshmallows in place of the "fluff" and it could work, the texture and end result just aren't the same. You CAN do it, but I'd heavily suggest using the marshmallow cream.
The time and place for the mini marshmallows is for melting to make the spider webs/mummy wraps, whichever you prefer to say they look like.
More of my favorite Fall Treats
If you love these Monster Fluffernutter Cookies, check out my other favorite fall version, Candy Corn Fluffernutters. They are based on the original that I baked for Joanna Gaines in the Silos Baking Competition.
And whether or not you are a fan of Candy Corn, make my Ultimate Candy Corn and Peanuts Snack Mix for Halloween night snacking while passing out candy.
While it might not be "Scary" it is scary good, all fall I love to make this Pumpkin Spice Bread that tastes just like Starbucks, but better cause it is fresh out of YOUR oven!
Did you make this recipe? Let me know by leaving a review or comment! And be sure to sign up for my newsletter, and follow along on Instagram, Pinterest, and Facebook!
📖 Recipe
Peanut Butter Monster Cookies
This recipe for Peanut Butter Monster Cookies takes my classic Fluffernutter Cookie and gives them a spooky Halloween twist.
Ingredients
- ¾ cup Crunchy Peanut Butter, not natural
- 8 tablespoons Unsalted Butter, soft
- ½ cup Brown Sugar
- ½ cup Granulated Sugar
- 1 Egg, room temp
- 1 tablespoon Vanilla Extract
- ½ teaspoon Kosher Salt
- 1 ½ cups All-Purpose Flour
- ½ cup Quick Cooking Oats
- 1 teaspoon Baking Soda
- 1 tablespoon Whole Milk
- ½ cup Reeses Pieces Candy
- ½ cup Halloween M&M Candy
- ½-1 cup Marshmallow Fluff/Cream
- Flakey Sea Salt, like Maldon or Nordur
- Candy Eyeball Sprinkles, for topping
- 5 large Marshmallows (or 1 cup mini), for making spider webs
Instructions
- Preheat oven to 350˚F and prepare 3 half baking sheets by lining them with parchment paper.
- In the bowl of a stand mixer fitted with the paddle attachment, combine butter, peanut butter, and both sugars. Cream together, scraping down at least twice, until everything is evenly combined. 4 minutes
- Add the egg and vanilla, and beat until well combined. 45-60 seconds longer.
- Add salt, flour, oats, baking soda, and milk, and mix at low speed until flour is completely worked in. Whack the mixer up to full speed and then off, quickly, for a final mix. 2 seconds.
- Fold in the Reeses pieces and M&M’s.
- Use a 2-ounce scoop to scoop cookies onto a parchment-lined cookie sheet. I use a small ice cream scoop for equal-sized cookies. You should get 12 extra large cookies.
- Flatten the cookies with your hands, add about 2 tablespoons of fluff, and fold the cookie up around the fluff, encasing it in the cookie dough. Flatten them just a little, again, once filled, and place them 3-4 inches apart on your parchment-lined trays. Only 4 cookies per sheet, they get BIG!
- Bake in the preheated oven for 16-18 minutes, just until the top and edges begin to turn golden brown and they have split and the marshmallow begins to show.
- Remove from the oven and tap gently on the stove or counter. Sprinkle them with the flakey salt and top each cookie with as many candy eyeballs as you desire to make your cookies spooky.
- Let the cookies cool on the pan for about 5 minutes so the fluff can set. Then transfer them to a cooling rack until completely cool.
- Finally, microwave the marshmallows in 15-second increments until they are gooey and stretchy. Stir them till you see strands begin to appear.
- Let them cool till you can touch them but still warm, then pick up a glob of them with your hands, stretch them to look like spider webs, and drape them onto the cookies. It gets a little messy but adds a spooky element to the final cookie.
Notes
NOTES & TIPS
Be sure to cream the butters and sugars together for 3-4 minutes, you will see the mixture change to a lighter color. When it gets pale you have beat in enough air.
After you have made your cookie dough, portion it out and flatten each of the 12 portions using your 3 center fingers. Place the marshmallow cream in a piping bag, then cut off the tip and pipe about 2 tablespoons into the center of each cookie. Wrap the cream in the dough, then flatten again before baking. This gives a very consistent and not too flat, not too tall cookie.
When the cookies come out of the oven. Immediately sprinkle them with some flakey sea salt, it helps cut the sweetness of the cookie and the marshmallow cream and makes them even more enjoyable!
I also reserve some candy for pressing into the top after they come out of the oven too. This gives that bakery look that you don't get from ONLY mixing the candy into the cookie dough.
Melt the marshmallows for stretching over the top in 15-second increments in the microwave until melted. Mine only took 45 seconds. Stir after each time in the microwave until stretchy.
Now is the time to exercise patience. The marshmallow stretching is messy. The best tip I have for you is, the less you work with at a time, the better. Use a small bit and stretch between 2 or 3 fingers and then press it over the cookies, brushing the marshmallow off onto the edges of the cookie to get it off your hands and to stick to the cookies.
Work slowly, and know it is a bit crazy, but if you get in the right mindset and have fun with it, the mess can be cleaned up with a little warm water.
Baked Fluffernutter Cookies can be kept in an air-tight container for up to 5 days at room temperature. And while mine would never make it there, they can be frozen for up to 3 months. Freeze them flat on a tray, then transfer them to a zip-top freezer bag.
SUBSTITUTIONS
My favorite peanut butter is crunchy! But you can use smooth in a pinch if you need to. There are whole peanuts going in later anyway.
If you have to use salted butter because that is all you have on hand, remove the addition of salt later in the recipe.
Light brown sugar is preferred for this recipe, however, you can use dark in a pinch. The cookies will just have a little deeper color and molasses flavor to them. Which isn't bad, just a little richer.
These cookies bake up beautifully and can be made gluten-free when you use THIS cup-for-cup baking flour swap.
I used a mix of Halloween M&M's and Reese's pieces candy for my cookies. You can use all of one kind if you prefer, but who doesn't want more chocolate and peanut butter?
While I prefer the original marshmallow fluff, you may also find other brands out there calling it marshmallow cream, they are essentially the same and you can use either for this cookie. You may also encounter it called marshmallow paste or spread.
While you might be tempted to use mini marshmallows in place of the "fluff" and it could work, the texture and end result just aren't the same. You CAN do it, but I'd heavily suggest using the marshmallow cream.
The time and place for the mini marshmallows is for melting to make the spider webs/mummy wraps, whichever you prefer to say they look like.
Recommended Products
As an Amazon Associate and member of other affiliate programs, I earn from qualifying purchases.
-
 Sweets Indeed Candy Eyeballs, Edible Eyes, Assorted Variety, Perfect for Cake Decorations, Baking, Ice Cream, Cookies, Cupcake Topper, 4.23 ounces (Candy Eyeball Tacklebox)
 -
OXO Good Grips 4 Piece Stainless Steel Measuring Spoons with Magnetic Snaps
-
OXO Good Grips 4 Piece Stainless Steel Measuring Cups with Magnetic Snaps
-
Vollrath 2 oz Stainless Steel Disher - Size 16,Dark Blue
-
SMARTAKE 200 Pcs Parchment Paper Baking Sheets, 12x16 Inches Non-Stick Precut Baking Parchment, Perfect for Baking Grilling Air Fryer Steaming Bread Cup Cake Cookie and More (Unbleached)
-
Nordic Ware Natural Aluminum Commercial Baker's Half Sheet (3 Pack)
-
KitchenAid KSM150PSCE Artisan Stand Mixers, 5 quart, Copper Pearl (Renewed)


Nutrition Information:
Yield:
12Serving Size:
1Amount Per Serving: Calories: 433Total Fat: 22gSaturated Fat: 9gTrans Fat: 0gUnsaturated Fat: 12gCholesterol: 41mgSodium: 340mgCarbohydrates: 52gFiber: 3gSugar: 32gProtein: 8g
This is an estimated caloric value, actual numbers may differ based on the ingredients used.

Leave a Reply